1. Introduction
Due to their efficiency and ease of handling, the use of implantable alloplastic biomaterials has become an integral part of facial reconstructive and aesthetic surgery. These materials are suited to be used both in pathological conditions (oncological, post-traumatic, or congenital) and cosmetics. Despite the use of autogenous tissues is considered the gold standard, several disadvantages such as long operative and aftercare times, donor site morbidity, and modeling limitations should be taken into account. The ideal facial implant should be capable of being easily placed and permanently maintain its form and position. The preferable implant material can often vary according to the anatomical site and the surgeon’s preference [
1]. The ideal implant material should be cost-effective, safe, non-antigenic, non-carcinogenic, and resistant to infection. Despite the fact that it should be inert, it should also be easily shaped. Implant materials that allow tissue ingrowth are difficult to shift; however, they are more challenging to remove once they have integrated into the underlying tissue. Two of the most popular implant materials used nowadays are High-Density Porous Polyethylene (Medpor) and Silicone. Silicone rubber is a non-porous material characterized by no fibrovascular ingrowth. The advantages of using silicone, as pointed out by Terino, include excellent biocompatibility, modifiability, conformability, and exchangeability [
2].
Although it is true that face implants stability is provided by their sub-periosteal placement and the rigid bone surface of the deep plane, one of the challenges of silicone facial implant surgery is the fixation of the implant itself. The ideal technique should be fast, easy to perform, with a reproducible result among patients and able to minimize possible adverse effects, such as malpositioning or dislocation of the implant itself. Implant migration seems to be correlated with lack of fibrous ingrowth, hematomas, seromas, and infections. While many studies found in the literature report the migration of such prosthetics, most of them focus their attention on the causes, not suggesting any countermeasures [
3,
4,
5]. Different methods of fixation can influence such an occurrence [
6]. Few techniques have been described in the literature in order to provide correct implant placement and avoid its movement until its integration. Peled [
7] in 1987 used a screw through the silicone implant to fix it on the underlying bone. von Szalay [
8] in 1994 suggested a 24-h percutaneous fixation using 18-gauge needles inserted in soft tissue and deeply into the implant. Peled [
9] commented on the work of von Szalay, describing a new technique with the use of percutaneous fixation through nylon sutures removed after 3 to 7 days. There has not been any update of the matter of subject since.
In this paper, we present an easy way to place the implant into the harvested pocket and at the same time, fix it percutaneously.
2. Materials and Methods
The study was approved by the internal ethical committee of the University (AOU-SUN 167/2011); the patients gave consent for the publication of this paper. From January 2012 to January 2017, 18 patients (1 male, 13 females, 4 transgender), with ages ranging from 24 to 52 years old (mean age 37.6 years old), underwent facial implants placement; a total of 31 implants were placed (1 pair of angles of the mandible implants, 12 pairs of malar/sub-malar implants, and 5 chin implants). In all the cases, smooth silicone implants were used (Implantech, Ventura, CA, USA). Previous facial Polymetylmetacrylate (PMMA) injections were reported by the patient and detected by ultrasonographic examination in one case only. All the patients were light-to-moderate smokers (6 to 15 cigarettes per day). In every case, multiple surgical procedures were performed, and in order to reduce contamination, the facial implants were always inserted first, with the exception of when they were associated with breast implants (
Table 1).
The intraoral approach was performed in 15 cases, and in the other 3 cases, the sub-ciliary lower lid approach was preferred. Implants were inserted with the method described in the “surgical technique” section and were fixed percutaneously. Patients were followed up at least for 1 year, with a maximum follow-up of 7 years (mean 1.8 years).
Surgical Technique
The procedure starts with the infiltration of two percent lidocaine (Lignospan) local anesthetic with a vasoconstrictor (1:100,000). An intraoral incision is performed with a scalpel, and a myomucosal flap is elevated. Before proceeding with a deeper dissection, any bleeding vessel is cauterized. Afterwards, the dissection goes on, and a subperiosteal pocket is created using periosteal elevators. After the pocket is harvested, the implant sizer is inserted into the pocket to ensure a correct dissection. Once the size of the final implant to be inserted is thoroughly considered and checked, the implant is meticulously placed directly over the skin in the area where it is planned to be located ready for the marking phase (chin, mandibular angle, malar area, etc.) (
Figure 1).
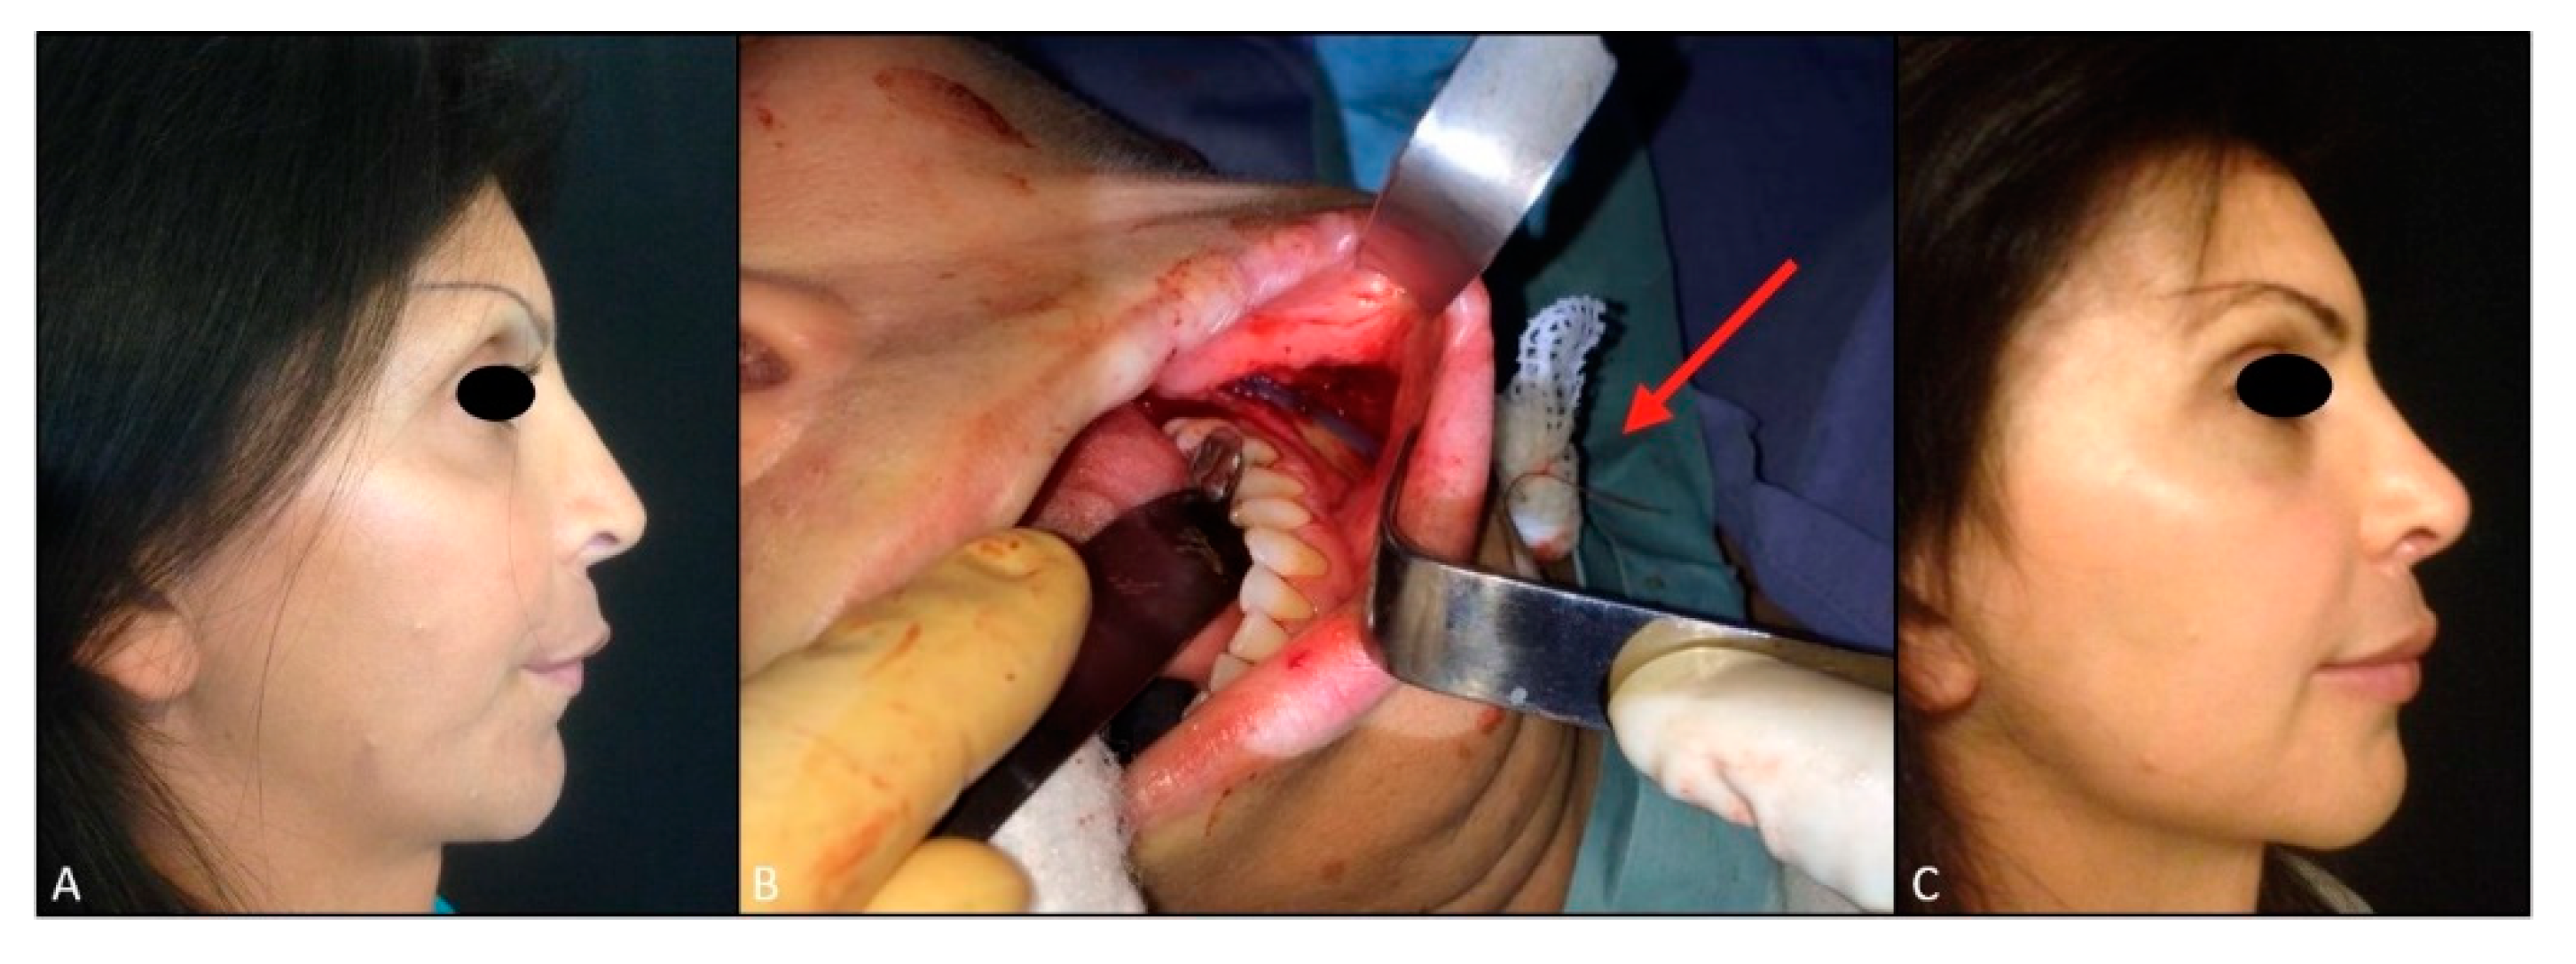
Two paramedian points over the implant are identified and pierced circa 1 cm from each other, using a 2/0 straight needle that runs to the underlining skin; then fixation points are marked on the implant and over the skin. The implant is soaked in a povidone-iodine solution (BETADINE soluzione cutanea, GMM FASRMA srl, Segrate-Milano-Italy) at 50% diluted saline solution.
A 2/0 straight needle absorbable suture (VICRYL 2/0 straight needle, Ethicon INC 2007) passes from outside to inside, from the skin to the subperiosteal pocket, and then through the implant from the outer to the inner side following the first marked points. Then the needle runs through the implant again in a reverse direction, from the inner to the outer side, from the pocket to the skin through the soft tissues, following the second marked points on the implant and above the skin. During these steps, the implant is still outside the pocket. The two suture ends are then pulled by the assistant surgeon, and the first surgeon carefully places the implant into the previously harvested pocket (
Figure 2).
The suture is tied over a piece of foam to avoid direct knot contact above the skin, firmly securing the outer surface of the implant to the periosteum. As soon as the pocket is closed, the inner side will be in direct contact with the bone surface. Intraoral accesses are closed in a double layer with absorbable sutures (VICRYL 3/0, Ethicon INC 2007). The suture stays in place, anchoring the implant to the harvested pocket and in the pre-operatively planned area, and is cut at the emerging points over the skin after 4 days, leaving the suture inside, thus avoiding accidental implant dislocations (
Figure 3 and
Figure 4).
3. Results
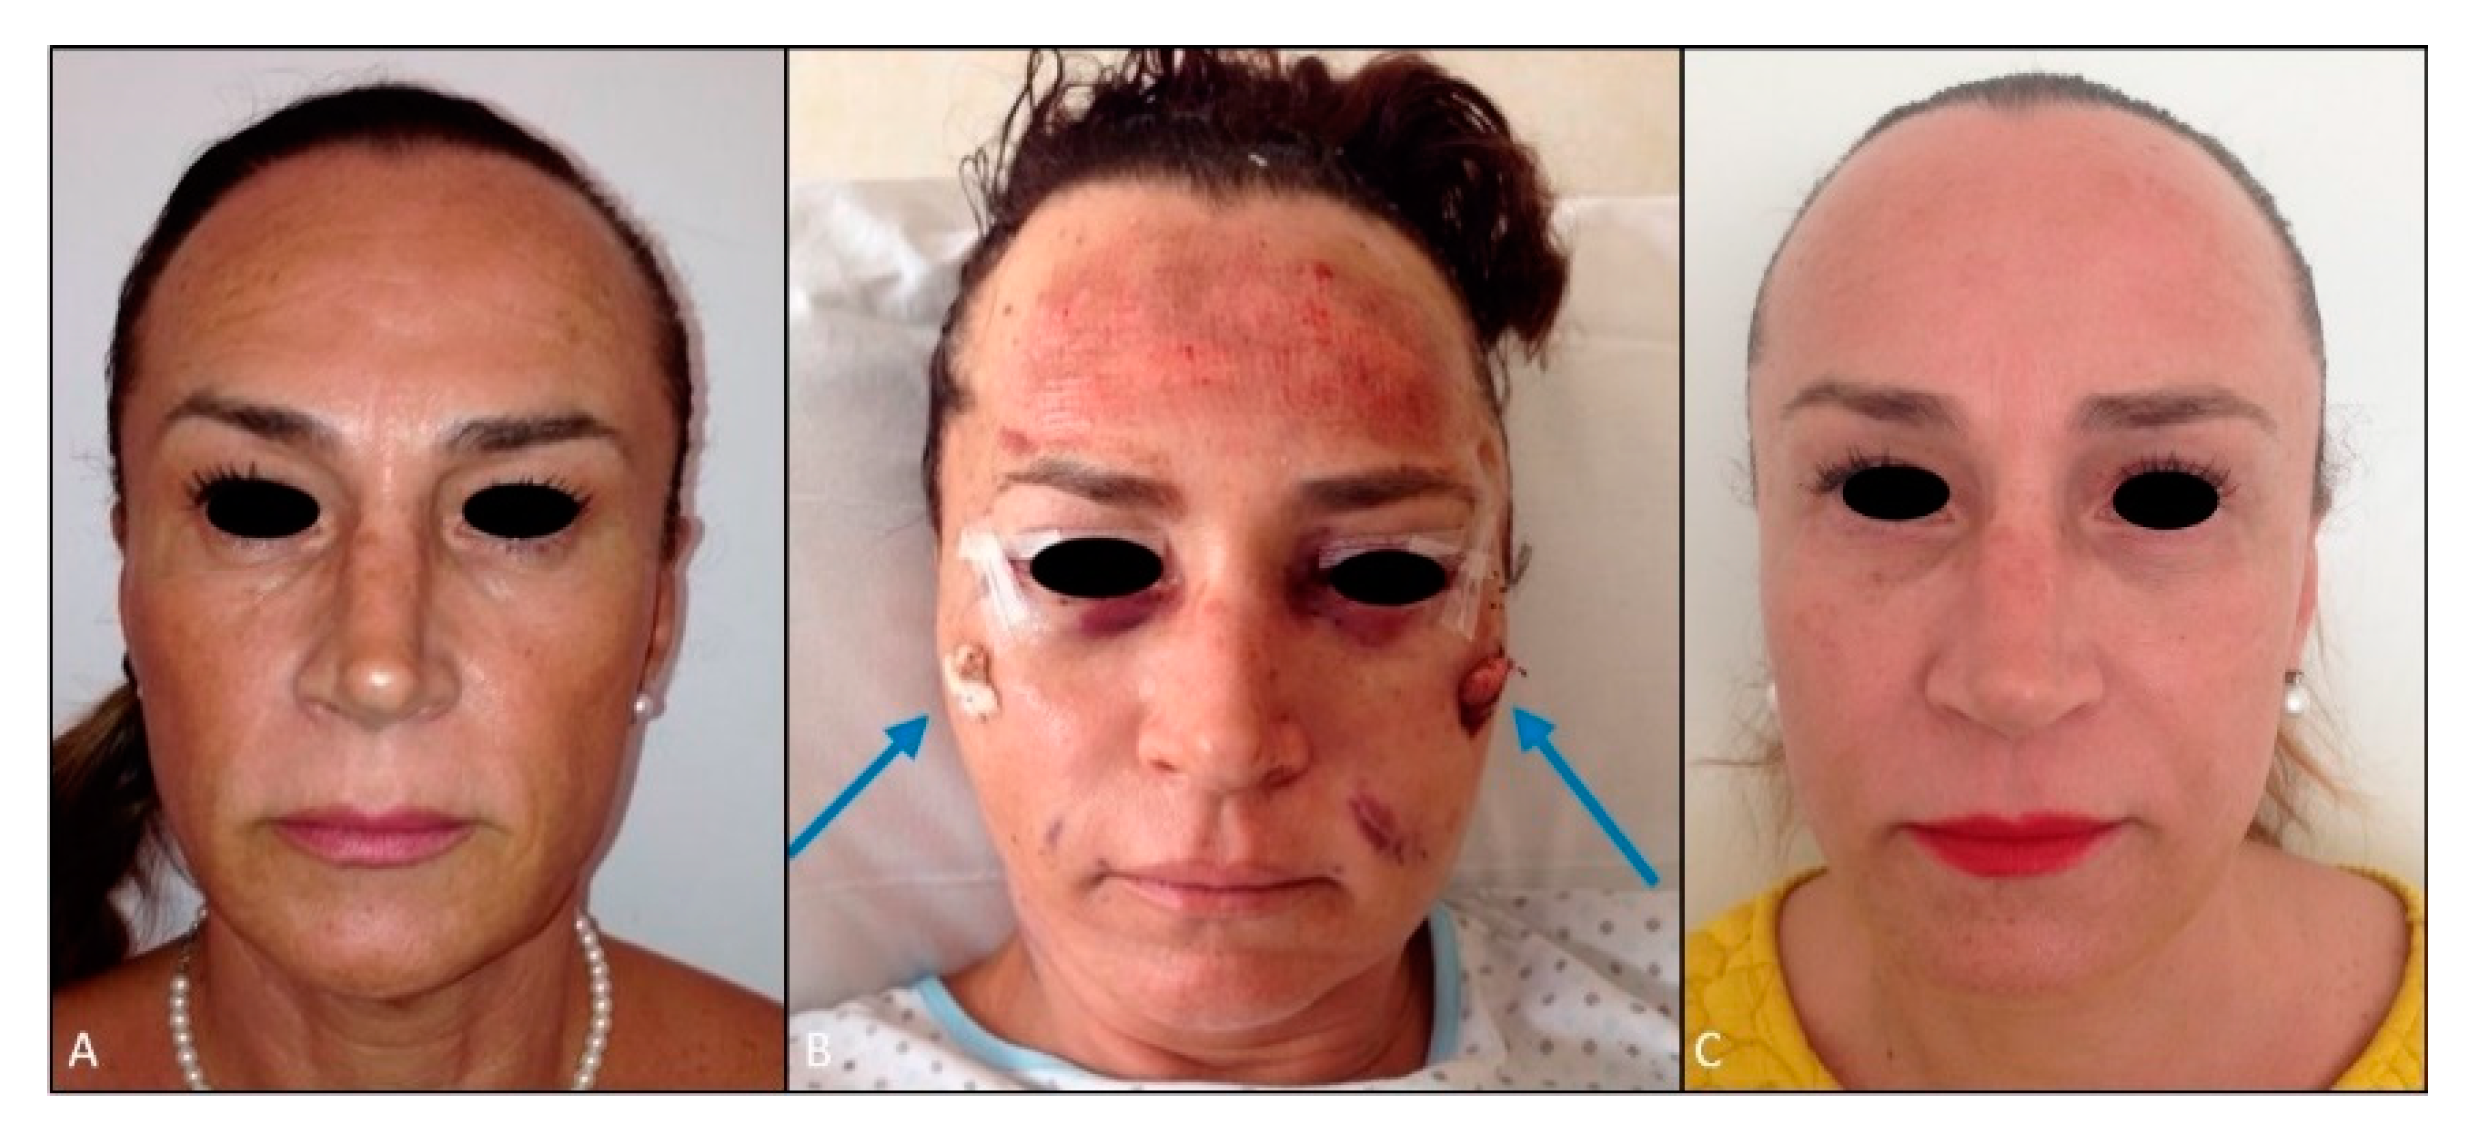
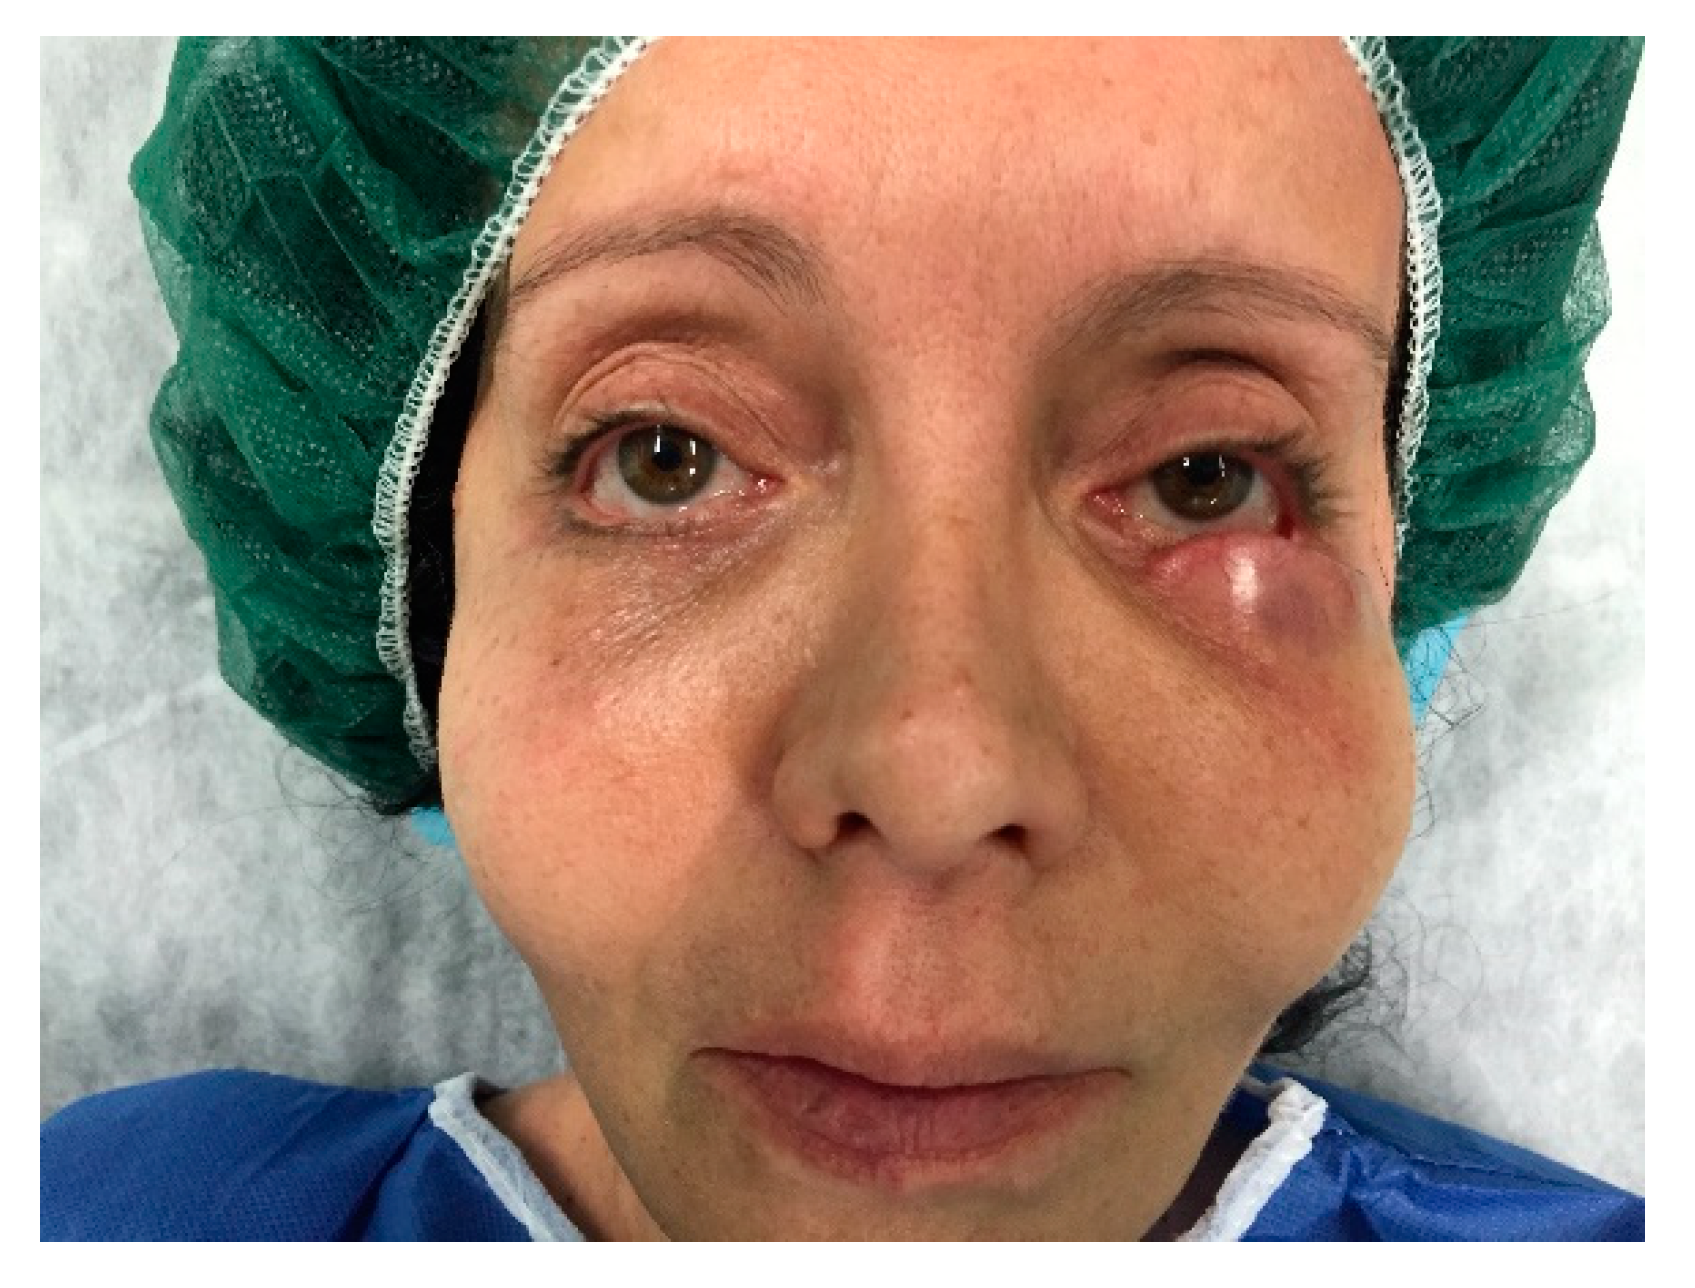
One case of implant displacement and infection was recorded on the only patient who had undergone previous facial polymetylmetacrylate (PMMA) injections. Three weeks after surgery, superior displacement of the left sub-malar implant with marked oedema and inflammation was detected (
Figure 8).
Implants were removed bilaterally; during surgical removal an abscess in the pocket was detected and subsequently drained.
No other complication was recorded. Postoperative surgical swelling lasted between two and three weeks for all the patients. Once discharged, the patients were told to avoid large facial muscular movements for seven days. They were also prescribed oral antibiotic and painkillers for five days, the use of 0.2% chlorhexidine digluconate mouthwash twice a day, and instructed to apply a cream containing hyaluronate and amino acids (Aminogam; Professional Dietetics, Milan, Italy) over the intraoral wound for 14 days. In cases of sub-ciliary lower lid approaches, steri-strips were placed over the surgical site.
4. Discussion
In a recent review performed by Rojas et al., it was concluded that facial augmentation with alloplastic material is a well-established technique with a low incidence of complications for both Silicone and Medpor malar, chin, and mandibular implants [
5]. The insertion technique of these implants is the same, regardless of the used materials. Although the fixation of silicone implants can be performed with several techniques, Medpor is exclusively fixed with screws.
Similarly, silicone implants can benefit from screw fixation, although the rigid fixation could damage the smooth silicone implant.
Consequently, the use of anchoring sutures to the periosteum or the percutaneous fixation of the implant has been described in the literature [
10,
11].
Szalay, in 1992, first described a facial implant fixation technique, which he carried out by placing two percutaneous 18-gauge needles through the soft tissue, deeply into the implant, which then remained in place for 24–48 h [
8].
In 1994, Peled replied to Szalay, suggesting a similar technique for temporary fixation of the silicone prosthesis [
9]. The implant was placed onto the skin in the desired location; two symmetrical points were marked on the silicone (A’-B’) and the corresponding point on the skin (A-B) that would then overlie the implant. A 4–0 nylon suture was passed through the full thickness of the soft tissue and from the pocket through the implant (anteroposterior) at point A and made its way out through the silicone (posteroanterior) at point B’. It then ran through the soft tissue and the skin at cutaneous point B. The suture was taped onto the skin or tied over a piece of foam and remained in place for three to seven days [
9].
In this paper, the used fixation technique was similar to the one reported by Peled 26 years ago, although some useful variations were added. We found that inserting the needle into the implant while it was outside rather than inside the pocket to be of considerable help; once the needle was passed through the four points (two through the soft tissues and two through the implant), whilst accompanied by the lead surgeon, the assistant surgeon pulls the two sutures thus carefully placing the implant into the pocket. Finally, the suture will be tied over the skin. This variation allows having better control on the final position of the implant contrary to the “blind” fixation proposed by Peled, with an overall stricter relationship of the implant to the periosteum and the underlining bone. Moreover, anchoring the suture outside the pocket allows the pre-operative position planning to be respected, avoiding unwanted malpositioning during fixation maneuvers. The firm position of the implant provided by the suture fills any gaps between the implant and both the superficial and the deep plane where hematoma or seroma could accumulate, causing its dislocation. Some authors suggested that the use of porous implants could decrease the incidence of this complication although the occurrence rate is generally low and not statistically divergent between porous and non-porous materials (0.75–0.83%) [
4]. Instructing the patients to avoid wide facial muscular movements for at least seven days is mandatory since the influence of muscular forces could promote the processes involved in this complication.
Another difference with Peled’s technique is the use of absorbable sutures that are left in place, with just the suture emerging from the skin being cut after four days. This is done in order to avoid implant displacement during suture removal. Polyglactin suture has great knot security, is biologically well-tolerated, and loses its tensile strength after about 14 days [
12,
13]. Therefore, during the first four postoperative days, the fixation of the implant is guaranteed while after the cut of the external threads, the inner parts will still hold some tension through the subcutaneous and periosteal healing tissue, until its full degradation. If left in place, the nylon thread suggested by Peled would more likely cause chronic inflammation compared to Vicryl and is therefore removed altogether. The action of removing the thread itself could cause unpredictable implant displacement or rupture, depending on the sliding through the scar tissue and on the capsule formation around the implant.
Dimpling, notching, or inflammatory sequelae with the use of a braided suture such as Vicryl were not detected.
Silicone implants induce a mild inflammatory response, followed by the formation of a thin dense fibrous capsule that surrounds the implant itself, ensuring a high degree of stability. Even though the inflammatory response could exceed, causing capsular contracture and has been thoroughly reported for soft tissue implants (mostly breast implants), there is little to no report in the literature of capsular contracture in facial implants [
14]. Our experience conforms to the literature.
In our series, 31 implants were inserted, and 1 case of infection/displacement was recorded; however, this complication occurred three weeks after surgery, and it developed exclusively in a patient who had had a non-absorbable filler injected into the face. Permanent fillers are a relative contraindication to facial implants, as these medical devices have to be placed below the periosteum and the fillers that are used are injected into the soft tissue, so we have two different planes. The complication that developed could have been associated to the suboptimal pocket harvesting with subsequent contamination of the permeant filler that had been previously injected.
The limitation of this study is represented by the low number of patients treated.
5. Conclusions
Anchoring a smooth implant for the initial postoperative days can avoid malpositioning. More than 25 years ago, the first technique to percutaneously fix facial implants was described. The technique described in this case series is similar to the one suggested by Peled, although some variations have been added. Such additions are represented by the use of sutures, not only to fix the implant but also to place it into the harvested pocket. Another useful tip is represented by the use of a larger absorbable suture that is “left in place”, cutting only the suture emerging above the skin, thus avoiding accidental implant dislocation or lesions during suture removal.
Despite this short case series showing some advantages of the aforementioned techniques to the authors in question, further analysis by means of case-control studies are required to gain a more complete understanding of the effectiveness and reproducibility of this surgical technique.

 ,
, 


